Installing the plug-in
Installing the plug-in
There are two ways to install the plug-in:
- (Preferred) Install the plug-in directly inside IntelliJ IDEA
- Download and install binaries either from JetBrains Marketplace page or from our GitHub repository
Installing inside IntelliJ IDEA
To install the plug-in from IntelliJ:
- At the right top corner click the gear button and from the dropdown list select the Plugins option
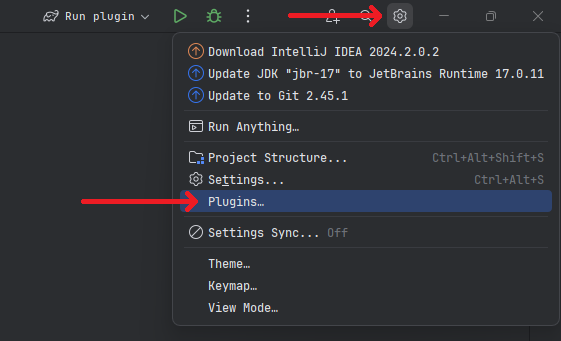
- Select the Marketplace tab on top of the window

- Type Zowe Explorer and click Install.

- Wait until the plug-in is installed, then click Restart IDE. IntelliJ IDEA will ask you if you want to restart the IDE to applly all the changes in plugins. Select Restart, wait until the IDE is restarted
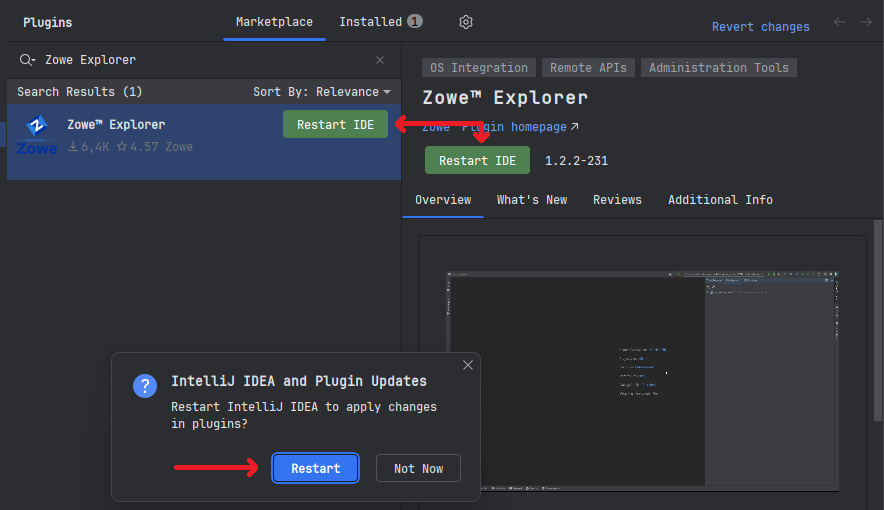
After the IDE is restarted, the plug-in's icon will appear at the right top corner. It means that you are ready to work with it.
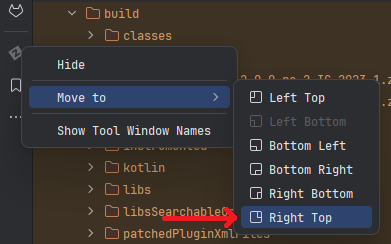
Sometimes the plug-in's icon appear at some different place, other than the right top corner. To fix it, right-click on the icon, in the Move To dropdown select the Right Top option.
Downloading binaries
We are responsible for the genuine software provided by the zowe community only. If you have any questions regarding the installation or the usage of the plug-in, feel free to contact any person directly related to Zowe
There are three ways of downloading binaries of the Zowe Explorer plug-in for IntelliJ IDEA:
- JetBrains Marketplace page
- GitHub Releases of our repository
- GitHub Actions of our repository
Downloading binaries from JetBrains Marketplace page
- Proceed to the JetBrains Marketplace page of the plug-in
- Click Get button or select the Versions tab

- Select the compatibility option and the channel of the distribution:
- Stable - the stable versions of the plug-in
- EAP - the Early Access Program versions of the plug-in, sometimes are provided for the EAP versions of the IntelliJ IDEA
- Preview - the next versions of the plug-in, that contain the bleeding-edge features of the plug-in, which may be unstable
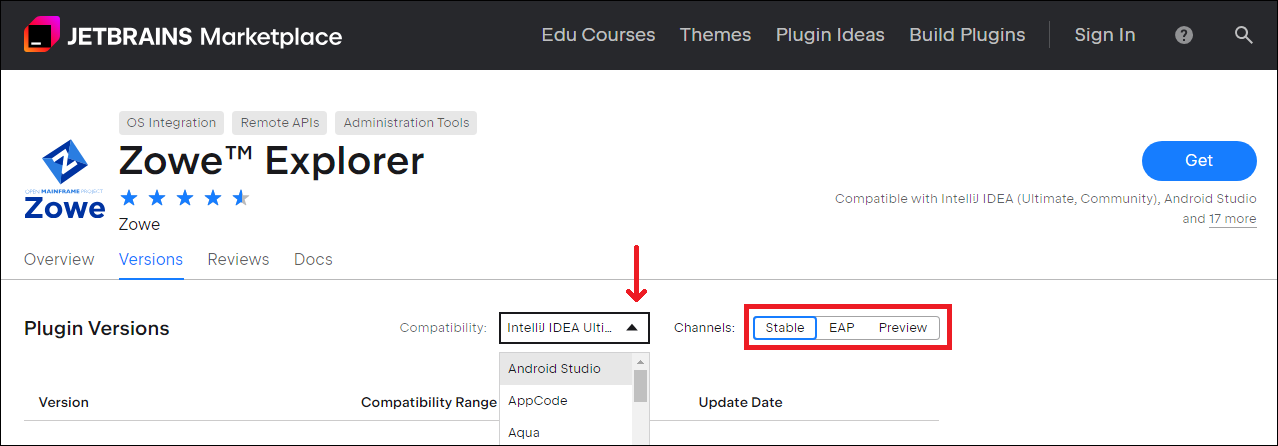
- Select the version of the plug-in you want to download, click Download button against it
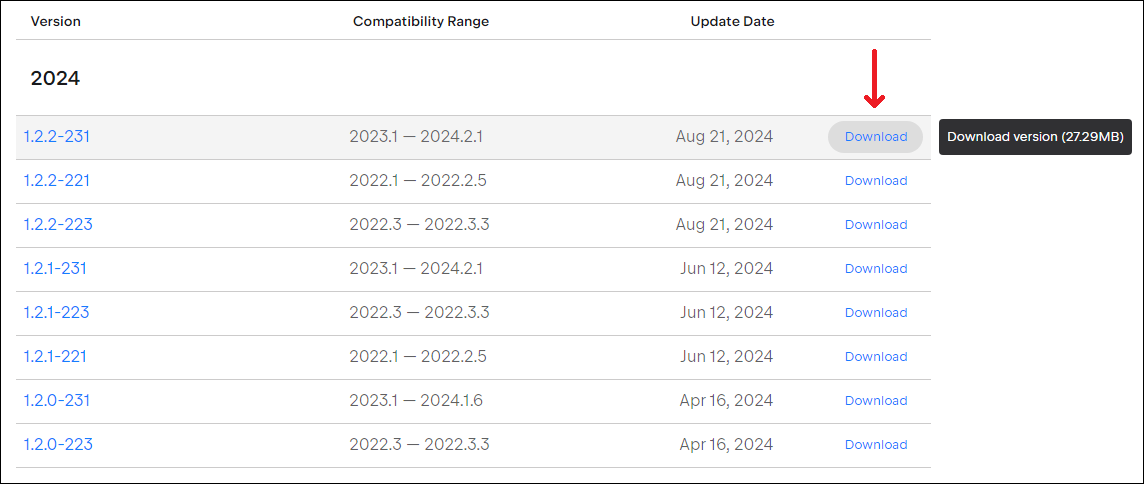
Downloading binaries from GitHub Releases
- Proceed to the GitHub Releases of the repository
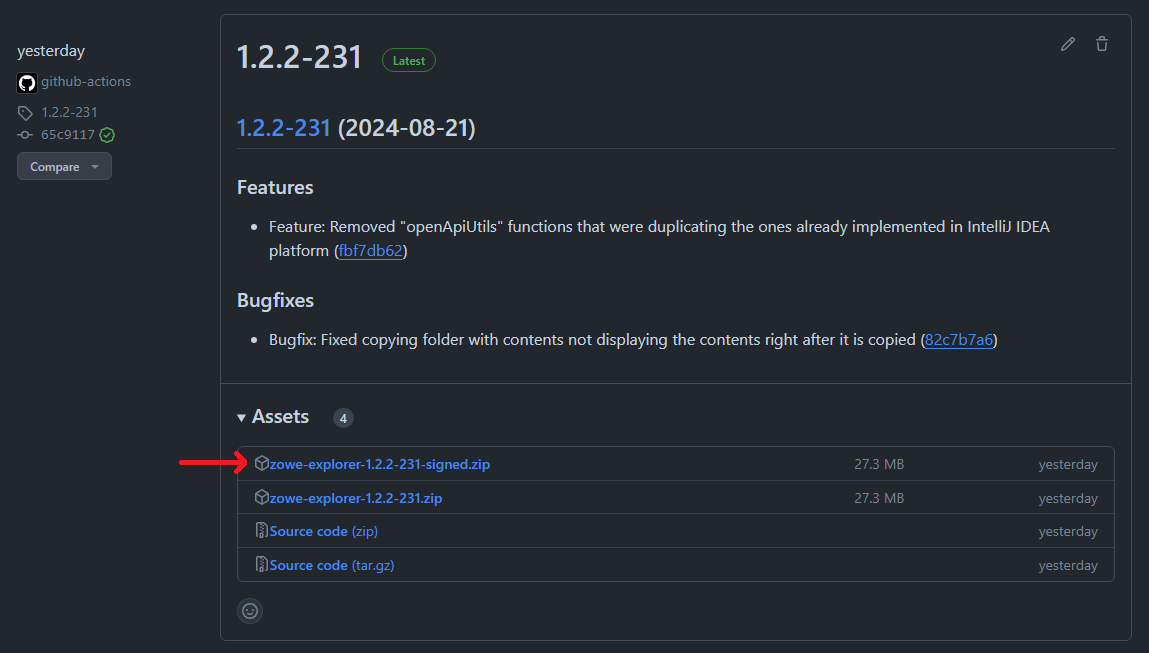
- Select the release version you want to install and click on the .zip file to download the binary
Prefer the "*-signed.zip" over the regular one
Downloading binaries from GitHub Actions
You need to be logged into a GitHub account to be able to download artifacts
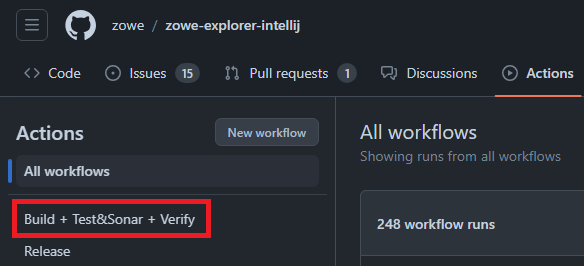
- Proceed to the GitHub Actions of the repository
- Select a build workflow
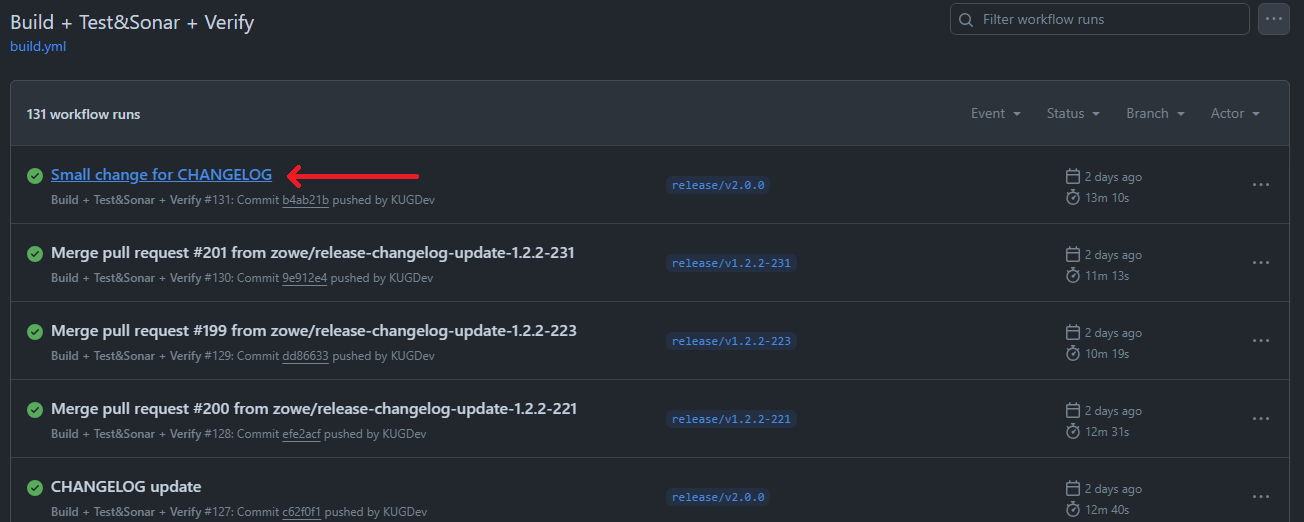
- Select the build of a branch you want to download
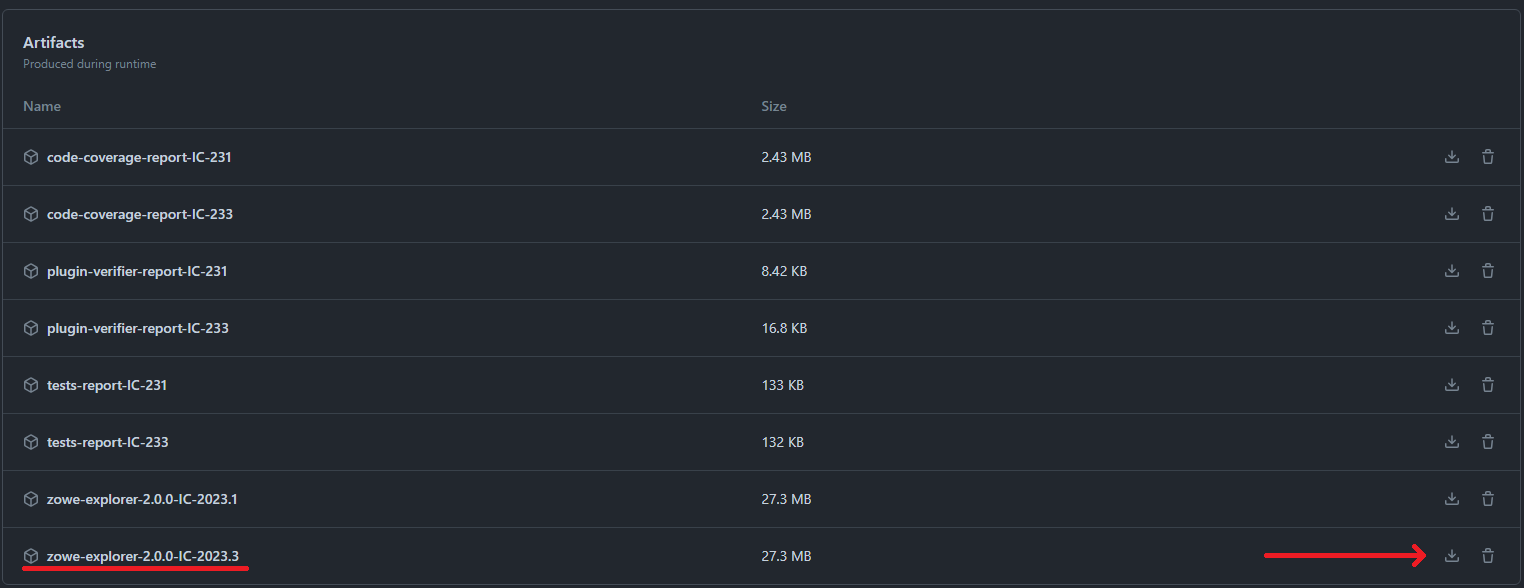
- At the bottom of the page, in the Artifacts section, select the .zip file with the version build to download
Installing binaries
After the .zip is downloaded, do the next steps:
- At the right top corner click the gear button and from the dropdown list select the Plugins option

- Near the Installed tab, click the gear button, from the dropdown select the Install Plugin from Disk option

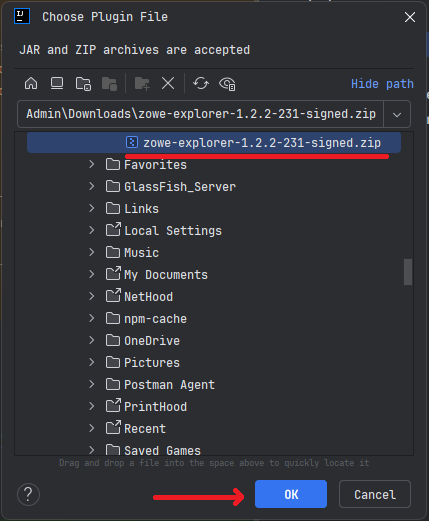
- In the Choose Plugin File dialog window, search for the .zip you want to install. Select it and click OK button
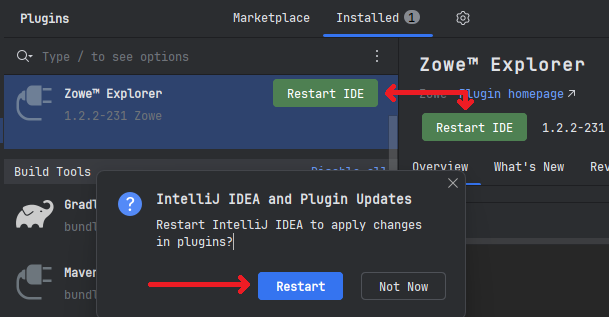
- The plug-in will appear in the Installed tab, click the Restart IDE button, and then the Restart button in the dialog window.
After the IDE is restarted, the plug-in's icon will appear at the right top corner. It means that you are ready to work with it.
Sometimes the plug-in's icon appear at some different place, other than the right top corner. To fix it, right-click on the icon, in the Move To dropdown select the Right Top option.
